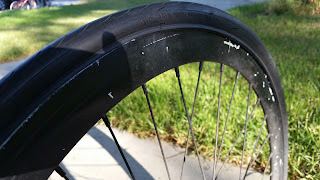
Is this your first time having a flat? Second? Tenth?
Having a flat bike tire is a pain in the butt. It's sudden, unexpected, and ruins your plans (not to mention that you have to go to the shop to get it fixed). Wouldn't it be nice to be able to fix a flat anytime, anywhere? Well know you can! And I'm going to teach you how
1.) Getting the tools
If you're gonna fix a flat, you're gonna need the tools. That means some cash is gonna get spent. However, luckily for you, these tools aren't that expensive. Here's the tools you'll need.
Make sure that you get a wrench that fits the nuts on your wheel properly. If your bike has quick-release levers, disregard the wrench.
Also, make sure you get the correct size of inner tube. I recommend only getting one but the more the merrier.
2.) Removing the wheel
Now that you have all of the tools, we can get into the first step: removing the wheel that has the flat. I dont really want to get too in depth in this part since the wheel you are removing can vary in difficulty depending on the bike you have. The best advice I can give is to slowly, but surely remove the wheel, while also taking note of how you're removing it.
3.) Fixing the flat
Now that you've removed the wheel, we can get into fixing.
1st step: Insert tire lever
Insert tire levers into side wall of wheel (where the tire clamps onto the rim)
2nd step: Push them down
Once you've got the levers in, you're going to want to push them down. Make sure you give enough space in between the levers, kinda like how I did in the pic (You can go wider, its just gonna be harder to push down)
3rd step: Take the tire off the wheel
After you pushed them down, remove one of the levers and maintain the other one in the tire. Get a hold of that lever and slowly drag it along the rim of the wheel. Go all around the wheel and you should eventually remove the tire from the wheel. You're only going to remove half of the tire off the wheel, not the entire thing
4th step: Remove the inner tube
Now that you've done that, reach into the tire, grab the inner tube, and pull it out
After you did that, you can go ahead and remove the inner tube and the tire
5th step: Put the tire back on
Now that thats out of the way, go ahead and put the tire back on (I suggest you inspect the tire in order to make sure that there is no spikes or things in it that can potentially make your tire go flat). Put half of the tire all around the wheel, as showed on the pic below
6th step: Install new inner tube
Once you have half the tire on the wheel, get your inner tube and place it inside the wheel. This is easy, just locate the hole where the valve goes into and insert it there. Make sure that you insert the tube in the correct side. Install it on the side where the tire isn't hooked onto.
After doing that, tuck all of the inner tube inside the tire (make sure you dont tangle the inner tube while you're inserting it)
7th step: Clamping the tire
After doing this, tuck the rest of the unhooked tire into the rim of the wheel.
You may feel that it tends to get harder the closer you get to completley sealing it. If thats the case, you can you use the tire levers to lift the rest of the tire into the rim, just be careful. If you aren't you may slash the inner tube.
8th step: Pump air into the tire
Once you've done that, the wheel is ready to go. All you have to do now is install some air. If you're not sure how much air you need, you can get a gauge (some pumps have one built into it) and measure the PSI. The side of the tire, as well as the inner tubes, should have specs on how much air is needed.
4.) You're all set!
Thats it! You did it! You've successfully fixed a flat, all on you're own. All you have to do now is remember the steps you took in order to get the wheel off and work backwards from there. If you see that you can't get the wheel back on, take wheel off, take air out of the wheel, install it onto the bike again, and put some air into it while its on the bike
I hope you enjoyed this how-to on fixing flat bike tires. Once you've done it, you won't forget it, and since you have all of the required tools, you can fix your flats anytime, anywhere.
Image links:
- https://images-na.ssl-images-amazon.com/images/I/31ku1tt%2Bj0L.jpg
- https://images.homedepot-static.com/productImages/06c6b203-d02a-40fe-9262-0ecb3e66ced0/svn/super-b-specialty-hand-tools-880009-64_1000.jpg
- https://i1.adis.ws/i/washford/656268?w=637&h=403
- https://images-na.ssl-images-amazon.com/images/I/61RnCFM-SYL._SL1500_.jpg


This blog by Ricardo Morales is very useful in that it addresses somehting that is a very common problem for people. So many people use bikes now either instead of a car to travel or for excercise. Bike tires go flat very often. I have had to change my bike tire many times and back when I had to do it for the first time this blog would have been very helpful. The photos that are in this blog assist you in fixing the flat as I.T goes step by step with you showing you what you should be doing or looking for
ReplyDeleteGreat job. Did you say that you are the one in the picture? There are a lot of extra phrasings of "you're going to want to," which is common in "how-to" speech, but probably not useful in written form.
ReplyDelete