Wednesday, September 12, 2018

Flat bike tire? Here's how to fix it yourself (COMPLETE GUIDE)

DISCLAIMER: This is to fix inner tube bike flats, not tubeless tires

Is this your first time having a flat? Second? Tenth? 

Having a flat bike tire is a pain in the butt. It's sudden, unexpected, and ruins your plans (not to mention that you have to go to the shop to get it fixed). Wouldn't it be nice to be able to fix a flat anytime, anywhere? Well know you can! And I'm going to teach you how

1.) Getting the tools

If you're gonna fix a flat, you're gonna need the tools. That means some cash is gonna get spent. However, luckily for you, these tools aren't that expensive. Here's the tools you'll need.


Make sure that you get a wrench that fits the nuts on your wheel properly. If your bike has quick-release levers, disregard the wrench. 
Also, make sure you get the correct size of inner tube. I recommend only getting one but the more the merrier.

2.) Removing the wheel

Now that you have all of the tools, we can get into the first step: removing the wheel that has the flat. I dont really want to get too in depth in this part since the wheel you are removing can vary in difficulty depending on the bike you have. The best advice I can give is to slowly, but surely remove the wheel, while also taking note of how you're removing it.

3.) Fixing the flat

Now that you've removed the wheel, we can get into fixing. 

1st step: Insert tire lever

Insert tire levers into side wall of wheel (where the tire clamps onto the rim)


2nd step: Push them down

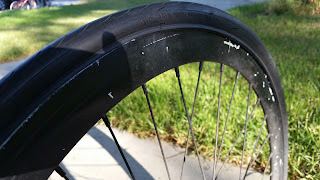
Once you've got the levers in, you're going to want to push them down. Make sure you give enough space in between the levers, kinda like how I did in the pic (You can go wider, its just gonna be harder to push down)


3rd step: Take the tire off the wheel

After you pushed them down, remove one of the levers and maintain the other one in the tire. Get a hold of that lever and slowly drag it along the rim of the wheel. Go all around the wheel and you should eventually remove the tire from the wheel. You're only going to remove half of the tire off the wheel, not the entire thing


4th step: Remove the inner tube

Now that you've done that, reach into the tire, grab the inner tube, and pull it out


After you did that, you can go ahead and remove the inner tube and the tire


5th step: Put the tire back on

Now that thats out of the way, go ahead and put the tire back on (I suggest you inspect the tire in order to make sure that there is no spikes or things in it that can potentially make your tire go flat). Put half of the tire all around the wheel, as showed on the pic below


6th step: Install new inner tube

Once you have half the tire on the wheel, get your inner tube and place it inside the wheel. This is easy, just locate the hole where the valve goes into and insert it there. Make sure that you insert the tube in the correct side. Install it on the side where the tire isn't hooked onto.


After doing that, tuck all of the inner tube inside the tire (make sure you dont tangle the inner tube while you're inserting it)


7th step: Clamping the tire

After doing this, tuck the rest of the unhooked tire into the rim of the wheel. 


You may feel that it tends to get harder the closer you get to completley sealing it. If thats the case, you can you use the tire levers to lift the rest of the tire into the rim, just be careful. If you aren't you may slash the inner tube.

8th step: Pump air into the tire

Once you've done that, the wheel is ready to go. All you have to do now is install some air. If you're not sure how much air you need, you can get a gauge (some pumps have one built into it) and measure the PSI. The side of the tire, as well as the inner tubes, should have specs on how much air is needed.


4.) You're all set!

Thats it! You did it! You've successfully fixed a flat, all on you're own. All you have to do now is remember the steps you took in order to get the wheel off and work backwards from there. If you see that you can't get the wheel back on, take wheel off, take air out of the wheel, install it onto the bike again, and put some air into it while its on the bike

I hope you enjoyed this how-to on fixing flat bike tires. Once you've done it, you won't forget it, and since you have all of the required tools, you can fix your flats anytime, anywhere. 


Image links:
- https://images-na.ssl-images-amazon.com/images/I/31ku1tt%2Bj0L.jpg
- https://images.homedepot-static.com/productImages/06c6b203-d02a-40fe-9262-0ecb3e66ced0/svn/super-b-specialty-hand-tools-880009-64_1000.jpg
- https://i1.adis.ws/i/washford/656268?w=637&h=403
- https://images-na.ssl-images-amazon.com/images/I/61RnCFM-SYL._SL1500_.jpg


Choosing Computer Parts for your First PC

Whether you want to build a computer for gaming, your workplace, or simply for fun, you're in the right place. A major part of building a computer is choosing the parts, which is what this how-to will be about. As a first timer, it may be confusing or even intimidating when it comes to choosing parts, however, it isn't hard at all. As long as you take your time and are careful, you'll have your PC specs, or specifications, in no time. During this blog I will be choosing parts with you, to make sure you are following along and getting the right parts. 


1) First things first, choosing your Processor. There are two main processor manufacturers. There's Intel and AMD. Without getting into too much detail, its safe to say that they are both great, especially when it comes to both of their most up-to-date line of processors. Intel has their 8th generation processors while AMD has their Ryzen line of processors. When choosing your processor you have to understand how the speeds of the component work. Both processors will display their "Base Clock Speed", which is basically the speed of the processor. So, the higher the Base Clock Speed, then the faster your processor will be. However, you will also have to consider the amount of "Cores" in said processor. The more cores, the more information your computer can handle. Higher cores are usually the best option when it comes to software that puts a lot of stress on a processor such as Adobe After Effects or Sony Vegas Pro. Whether you choose AMD or Intel processors, there will be no major difference in the selection of parts other than the motherboard, a part which will be discussed later, since the sockets are different. For the sake of this blog, lets choose an AMD Ryzen 7 2700x. A processor with a base clock of 3.7 GHz and 8 Cores.


2) Next, it's time to choose a motherboard compatible with the Processor you have chosen. First off, you have to know the type of socket your processor can fit into. To find out, simply search online for the socket. Basically just put the name of your processor and add "socket" right after and search for it online. Something like "Ryzen 7 2700x socket" or "Intel i7 8700K socket" would be fine. Those searches will lead you to either Intel or AMD's websites (depending on the processor you searched about) and display a list of specifications of said processor. Just look for the section about the socket and you're good to go. For the processor I chose, the socket will be "AM4". This means that the motherboard I will choose for my computer has to be AM4 compatible. Same goes for Intel Processors. If your Intel processor socket is "LGA 1151" then the motherboard has to be LGA 1151 compatible. A simple way of finding a compatible motherboard is to search up on Amazon "AM4 Motherboard". Many AM4 compatible motherboards will show up, so at that point, choose one of your liking. The motherboard I will choose for my processor is the Asus Prime x470-Pro. 


3) Next we have to choose your Ram Sticks. Ram sticks allow your computer to temporarily store data meaning, more Ram = more storage = more tasks running on your computer. In other words the more ram you have the more applications you will be able to run without any major slowing of your computer. Ram sticks have both capacity and speed. A standard Ram stick is usually either 4 GB or 8 GB and sometimes 16 GB. When it comes to speed, they usually go up to 4600Mhz, meaning your pc will run faster and smoother. However to reach the speeds advertised, you usually have to overclock which is why for first timers such as yourself, it's recommended to buy some that you simply like. 16 GB of ram is perfect for anything, however, if you cannot spend that kind of money, 8 GB is enough for now. Different Ram fits different motherboards. One way to find Ram compatible to your motherboard is by simply checking the kind of "DDR" it is. Recent motherboards and processors are compatible with DDR4 Ram. But just to make sure, check the specifications of the motherboard you chose. It usually says, "Supports DDR4 Ram" or "Ram Technology DDR4", and sometimes it just states "DDR4" meaning it supports that Ram. If the motherboard you chose doesn't support DDR4 but rather an older Ram, such as DDR3, then simply buy the older Ram. For my computer, I'm getting a T-Force Night Hawk DDR4 16 GB Ram Kit.


4) Now we have to choose a graphics card. Graphics cards are necessary if you plan to either play games or use 3D Software requiring a good graphics card, such as all of Adobe Creator Suite's applications. When it comes to Graphics cards, there is no need to check for compatibility because all up-to-date GPU's (Graphics Cards), which are most recommended, are compatible with all motherboards. The GPU I chose is the EVGA Geforce GTX 1070.


5) With your main components chosen, you now need a hard drive to store all of your files. If you're looking for a simple and fairly cheap hard drive, going for any HDD (Hard Disk Drive) with your preferred space is enough. However, if you'd like your system to have a faster startup and quicker file transfers, then an SDD (Solid State Drive) is recommended. The difference between the two is that an HDD stores any information you download, and whenever you need to use the information or app, it takes a longer time for the information or apps to start up because it takes longer for the HDD to find it since it basically looks for said information. When it comes to an SSD, it stores the information, but it doesn't have to look for it since it is always available, meaning quicker launches every time. Either way, they both do the same thing, store data, which means you can get either one. For my Hard Drive, I chose a Samsung 860 Evo 500GB SSD.


6) The real question here is, how will my computer receive power? Well, from a wall outlet, but you will need a power supply to connect to the wall outlet. Power supplies come in three ways, modular, semi-modular, and non-modular ones. The differences are that modular power supplies allow you to connect only the cables you need to the power supply resulting in the best cable management possible. The semi-modular ones have the main cables such as motherboard, CPU, and GPU ones automatically connected to the Power Supply, but you can connect other needed ones as necessary such as SATA cables for your hard drives and such. The non-modular ones automatically have all of the cables connected whether you use them or not meaning, if you don't use 3 or 4 cables, they will just be stuffed in your computer case looking like a mess. Either way, they all do the same thing, supply power to the components of your computer. The only thing you have to look out for is how much wattage your power supply is. If your components are beefy and require a lot of power, a higher wattage one is recommended, however if the parts are average, then a basic 500-600 Watt power supply is enough. However, let's say your computer only needs roughly 675 Watts. If you get a 750 Watt Power supply, it doesn't mean that your components are receiving all 750 watts. They will only receive what they need which is 675. The only reason you would buy a larger power supply than needed would be to prepare for any upgrades you might have in the future. For my computer I found that a EVGA SuperNOVA 750 Watt power supply was enough for all my components. 


7) With all your components, you just need the final cherry on top. The computer case. Your computer case is where all of your parts will be installed into thus creating your desktop. The only thing you'd need to look out for is what size motherboard is supported in your case. In the description of the case it should state the max size motherboard it can fit. For example, if the case says it is an ATX case, then it means it fits motherboards that are Mini ITX, Micro ATX, and ATX. To list the sizes of motherboards that are most used in order of smallest to largest, they are Mini ITX, Micro ATX, ATX, and E-ATX, however there are more as seen in the picture bellow. 


Those aren't used other than in server systems and such, so your motherboard will most likely be the ones listed before. With that being the only thing to look out for, now just choose the case most aesthetically pleasing to you. In my case, (get it?) I chose the Corsair Crystal 570X ATX Mid-Tower case since my motherboard is an ATX size motherboard. 


With all of your parts chosen and ready to go, the only thing left is to build it. You can search online for tutorials on how to build one. There are many out there referring only to Intel or AMD processor builds, since they are a bit different. If you'd like to follow someone else's process when building a computer search on YouTube as well. There's plenty of videos of people you can follow step-by-step without missing a single thing. And lastly, have fun. Building a computer shouldn't be a hassle but more of a new and fun experience into a world never thought of before. Who knows, maybe one day you'll be making insane machines such as these. 


Tuesday, September 11, 2018

How To Make a Simple Yet Tasty Burger!

Whether you are at home with family, out at the park, or even just hungry but tired of buying food out and feel like making something simple yourself, then you can't go wrong with a burger! Here are some simple steps to make a burger.

Step 1: Going To Your Supermarket And Picking Out Ingredients


The ingredients that you will need are the ones as listed:


-Cheese -Tomatoes -Onion (red or white) -Lettuce -Pickles -Brioche Buns (or any other bun based on preference) -Ketchup -Mayonnaise -Barbecue -Mustard -Sriracha -100% Lean Ground Beef -Salt and pepper (for seasoning)

Step 2: Getting Ingredients and Grill Ready 


(It is recommended for you to have a grill as it is where burgers are usually made, if not you can cook them on a pan that has groves on the inside.)

-While your grill is warming up, begin cutting the tomatoes in slices that will fit in the burger bun.
-After you are done move onto the lettuce and cut the leaves off into sizes that will also fit in the burger bun.
-When cutting the onion, wear gloves if you have some as the smell of onion can stay in you fingertips for a while.
-Moving on to the pickles, cut thin slices if the pickles purchased were not pre-sliced.
-For your beef, make a couple of sizable balls of the meat and then apply pressure on the top to make the shape of a hockey puck. (The shape will not be perfect but try your best to get that shape) Once you have the meat in the required shape, mix the salt and pepper on a container and drizzle a fair amount of it on the beef patties. (not too much because then the patties will be too salty)

By now, your grill will most likely be warm enough around 450F to be exact. So now it will be time to move onto the next step.

Step 3: Grilling Beef Patties... (There's More Than One Way?)


If you haven't been to restaurants that have asked for what temperature you want your meat to be cooked in then this might sound completely new to you. Mc. Donald's, In-n-Out and other fast food chains typically cook you the burger between medium well and well done without asking you. This is the base way to eat your burger, however, if you feel that your burger is missing flavor then it is most likely because your patty is too dry and is well done. 


Meat temperatures:

-Rare: Cook patty on one side for three minutes. Turn it over and cook for an additional three minutes. 
-Medium Rare: Cook patty on one side for three minutes. Turn it over and cook for an additional four minutes. 
-Medium: Cook patty on one side for three minutes. Turn it over and cook for an additional five minutes. 
-Medium Well: Cook patty on one side for three minutes. Turn it over and cook for an additional six minutes. 
-Well Done: Cook patty on one side for three minutes. Turn it over and cook for an additional seven minutes. 

Step 5: Put All The Ingredients Together And Enjoy! 


Toast buns if you would like and put all the ingredients you have together and enjoy your creation! As a side recommendation, medium rare or medium are the best tasting temperatures to eat a burger at, if you want to get the most juicy flavor!
Image Links Section:
https://cdn1.medicalnewstoday.com/content/images/articles/273/273031/tomatoes-close-up.jpg
https://cdn1.medicalnewstoday.com/content/images/articles/276/276714/red-and-white-onions.jpg
https://cdn.shopify.com/s/files/1/1078/0310/products/bread-bread-la-brioche-buns-6ct-bag-1_1024x1024.jpg?v=1480679709
https://www.gannett-cdn.com/-mm-/0daa7fe28d53b124ca95b8ab01f9b9d088be72e4/c=68-0-731-373&r=1280x720/local/-/media/2018/04/11/USATODAY/usatsports/MotleyFool-TMOT-d4907843-fc2b9e58.jpg?quality=10
http://a57.foxnews.com/images.foxnews.com/content/fox-news/food-drink/2018/04/24/7-tips-to-cook-burger-without-grill/_jcr_content/par/featured_image/media-0.img.jpg/931/524/1524520225481.jpg?ve=1&tl=1&text=big-top-image
https://www.wellandgood.com/wp-content/uploads/2017/08/ThinkstockPhotos-red-onion-knife-quadxeon.jpg
https://78.media.tumblr.com/tumblr_lodxk6EK6g1qb8tmao1_500.jpg
https://scjdmcdn.azureedge.net/~/media/rightathome/editorials/food-and-recipes/recipes/dinner/how-to-grill-the-perfect-burger/how-to-grill-the-perfect-burger_body_1.jpg?h=2310&w=1540&la=en-US&hash=8DD4A11B0B871B43AD9D26A628071F39D27CE82C
https://foodanddrink.scotsman.com/wp-content/uploads/2017/06/18033314_1896901237264099_1167053636632673874_n-750x400.jpg

When Mother Nature Shakes

Earthquake is a natural disaster that occurs when two edges of the tectonic plates move and shift upon each other and causes underground rocks to break at the fault. This sudden phenomenon releases an immense amount of energy and causes seismic waves and vibrations that make the ground to shake. As a result, buildings collapse and heavy items in your house falls down to the floor that causes injuries and properties damages. Although earthquakes can be rare in certain regions of the world, it is still consider very dangerous. No matter how small the shake is, this natural disaster must not be overlook. So in an event of an earthquake, here are some basic safety tips on how to survive the shake.


Tip 1: Prepare Now


It is always good to stock up on survival food supplies and medical kits in case of an emergency. Natural disasters such as an earthquake can strikes so suddenly and so quickly that it is very hard to know when to act and response. So it is recommend to have canned or packaged foods and bottled water be available throughout your house and inside your automobile. Try to have ready-to-eat canned meats, fruits and vegetables. Avoid using foods that are in glass bottles and jars because it may break during the disaster. Canned foods can be heated indoor with candles or by using fire pits. Packaged foods can range from cereals and protein bars to noodles in a cup or ready-to-eat rice. These supplies can be store in places such as under tables and inside car's trunk or any places that can protect it from damages. As long as you can access it with ease so it is easier to get to.


Tip 2: Stay away from glass and other hazards.


When the shake begins, quickly find an open area that is clear from objects that potentially can falls on you. You may think that these objects will not fall because they are quite sturdy and strong. As the shake progresses, debris falling from the ceiling may causes the the windows to break and shatters everywhere. The sharp glasses can cut through your skin very easily when you are not careful. If you are outside when this occurs, quickly move to an area that has the most empty spaces. Meaning, stay away from tall buildings as it can potentially collapses and crumbles down. Streetlights can falls on your head. And utility wires such as from underground or telephone poles can electricute you. Also be aware that sprinkler systems or fire alarms may turn on. At any moment in time during the earthquake, these objects can cause many injuries.


Tip 3: drop, duck, and cover


Yes, the classic “drop, duck, and, cover” phrase that many of us were taught in school at a very young age. We were told to crawled under the nearest desks or tables and used our hands to covered our heads. To some people they might think that this is tedious because isn’t better to be outside in an open area before a shake. Of course, being in a clear open space is safest because there will be no objects that can fall on you. But if you cannot evacuate the building on time before the shake whether at work or home, then the quickest and easiest things to do is to find cover under a table. In most cases, a table can help shield objects falling onto your head. But sometimes it is not a good idea because the horizontal roof top is parallel to the ground. Heavy objects can falls perpendicularly onto the table top. Which means that the table is directly absorbing full impacted damage. So a very heavy object can possibly break the table in half. It is wiser to find cover under something that creates a slanted roof above your head. That way when heavy debris starts to fall, the objects will most likely to hit and slide down due to the angle of the roof.


Tip 4: Remain at position and Stay Calm

It is very possible that there will be aftershocks that can be just as bad as the first one. If you are outside stay outside and if you are inside a building remain inside. It is very important that everyone needs to stay where they are and remain calm. This is because someone may be unlucky that debris may start falling from above when they try to go from one location to another. So it is just a better idea to continue to protect yourself until it is absolutely safe to leave.


Tip 5: Try To Survive


If you are stuck and cannot escape then instead of wasting energy in trying to get out, it is better to gather up your food and water supplies first. This is because you do not want to starve yourself. Yes, it is important to seek for help if possible but sometimes help might not come to you as quickly as you want to. While waiting for help, the feeling of worry and fear can thrive hunger. So you must remain calm and turn on the radio or any type of communication devices to search for help. Wait and portion out your foods so you can last as long as possible for the rescuers to come and help you. As for this kind of disaster, local officials and authorities will automatically sent out rescuers to look for survivors. So it is just the matter of time that rescuers will search and find you.


credited sources:


Mountain Biking for Dummies

Mountain Biking for Dummies 

Mountain biking is one of the most fascinating  yet challenging sports that can be. In contrast to any other cyclist a mountain biker gets to explore the unexplored while doing an intense cardio workout. Mountain biking is a sport people can do for fun as well as for competition; alone or with company; and even when the weather is not the best you can't stop having fun. Furthermore, there are several things that have to be consider before entering this amazing sport, such as choosing an appropiate bike and learning how to master it.

  • Choosing the right bike 
  1. Budget: The price of a decent mountain bike can vary from $600 to $10,000, so if money is not an issue there is a wide variety of bikes to choose from. However, if you really don't want to spend a ton of money on a bike I would recommend getting an used one from places like craigslist, offer up, etc. Here you can find a decent bike for about $600 to $1,500. On the other hand, if you want to go for a new one there can also be various specials for bikes going around $1,200 to $2,000. In addition, when shopping for a bike is important that you know the right frame size that you need, so I will leave this link with a helpful chart.        
  2. Anatomy of a MTB: Most affordable bikes are built out of aluminum, while  more expensive ones are build using carbon fiber. Aluminum is a strong yet light and inexpensive material, while carbon fiber is stronger and much lighter but more expensive. For a beginner in mountain biking I recommend aluminum bikes, or if you are trying to keep the bike for professional competitions then carbon fiber is the ideal choice . Some other elements that rise the price, quality and performance of a bike are its components; such as brakes, handlebar,

    seat, rear and front derailleurs, etc.  Some of the most recognized brands of bikes components are Shimano and Sram. You can click the link to get more details about these components.                              
  3. Type of Mountain bikes: Mountain biking is divided into various categories such as cross-country, trail, downhill, etc. The main difference between them is the condition of the terrain where the bike is going to be ridden. For example, a cross-country and a trail bike can be used for almost any type of terrain including large plane trails, hill climbing or even downhill up to some degree. Downhill bikes are more robust bikes made for rougher terrains, these bikes have longer suspension travel so they can maneuver better while going fast and absorbing big bumps. Characteristics of the different types of mountain bikes are very broad for a simple explanation,  you can click the following link for a more detailed explanation of each type.
  4. Google it!!!
Always google any questions you have about a bike!!! When looking at either new or used bikes its always a good idea to research people's experiences with that specific model, as well as the current market value of the bike. Mountain bike's forums are also a very helpful tool where you can chat with people and ask for advice or share any experiences.
  • Mastering the bike and yourself
  1. Training: No matter what sport you choose to practice, the trick for excellence is always practice and perseverance. My advise for every beginner, knowing that training time can be limited, is; go out on a ride by yourself or with a friend at least once a week and find the motivation needed to ride a few more miles each time. In addition, find a group of people who goes out on fun rides every Saturday or Sunday; these people are always very friendly and will be happy to accept a new enthusiast into their group. Fun rides sometimes turn into competitions, which will help you find motivation to better yourself. If its not possible to go out on a ride for training you can train 30 to 60 minutes on a stationary bike at home or at the gym, it will help a lot!!!
  2. Safety and comfort: Always wear a helmet, every now and then you will get carried away by adrenaline while going fast on a trail, so don't let a rock in the middle of the way hurt you bad enough to quit the sport. One of the most important things of a mountain bike that most people take for granted is the seat, after a few hours of riding through rocky trails the ride itself can get pretty rough in you legs and glutes, so make sure you invest in a good seat. A good seat marks the difference between a poor ride and an extraordinary ride.
  3. Tips: A well maintained mountain bike will always give you the most fun while riding, so make sure to lube the chain before and during every ride, make sure the tires and the suspension are at their specified air pressure, clean the components after each ride, etc. This video explains some essential maintenance tips. In addition, experience is something that can only be obtained by practice, so once you have gained enough experience and knowledge about bikes you will be able to upgrade your gear and bike. Lastly but not less important, many people wear clips that attach to the bike pedals; I would recommend not wearing them until you are confident enough about yourself an about your bike, unless you want fall off your bike when you are not even on it yet.


Sources:

  • https://www.youtube.com/watch?v=xglmDRfXDSk
  • https://www.freethepowder.com/pages/mountain-bikes-what-are-the-different-types
  • http://www.mtbtreks.com/beginners-guide-to-mountain-bike-groupsets/
  • http://www.radians.com.ar/blog/?p=375
  • http://www.rbinc-sports.com/bike-sizing

How to Choose Guitar Pickups - A Parametric Approach


As one gains experience playing guitar, the desire to improve will eventually extend beyond practicing and will lead to exploring better equipment. Guitar pickups are an important component in the guitar equipment ensemble, but are not widely understood, even among experienced guitar players. This blog will serve to briefly explain what guitar pickups are, why they matter, and how an enthusiast of any guitar skill level can use this information, and their familiarity with electronics and basic electrical theory, to make an informed and parametric decision when purchasing them.

1. Understand What Pickups Are

Anyone who is relatively practiced knows, or thinks they know, what a guitar pickup is. It is a safe assumption that most only have an elementary understanding of what a pickup is, meaning with respect to the guitar, e.g. what it looks like, where they are mounted on a guitar, and their general function.


While having only a basic understanding of what pickup is will not prevent you from improving your skills, it will definitely limit your ability to make an informed decision when purchasing new pickups.

Guitar pickups are transducers which convert the vibrations of guitar strings into electrical signal. This conversion is done by a coil and magnet. 


The magnet serves to magnetize the guitar string. The guitar string thus acts as a vibrating magnet once it is struck. Each oscillating movement of the guitar string will cause and correspond to a change in the magnetic flux of the coil. Changes in the magnetic flux of the coil will induce a voltage, of varying degree, in the coil. If plotted, the graph of the voltage induced would be a sinusoidal wave, moving up and down just as the guitar string does when it vibrates. The voltage is transmitted as an electrical signal by wires connected to the coil in the pickup, which can then be fed through an audio cable and into an amplifier. In summary, the vibration of the guitar string is converted into a voltage that "vibrates" (oscillates) just as the string does.


2. Understand Why Choosing the Right Pickup Matters

Understanding why choosing the right pickup matters is what will take you from this... to this.

Jimi Hendrix, famed guitar player who utilized numerous
 innovative techniques to transmit sound from his guitar

Electrically, guitar pickups act as a second order low-pass filter circuit, which can be modeled in a circuit diagram as an "RLC" circuit. A circuit consisting of a resistor, an inductor, and a capacitor, where the input voltage is the voltage translated from the oscillating guitar string to the coil.


Low-pass filter circuits function as their name suggests, a cutoff frequency is designed into the circuit, and any frequency lower than the cutoff frequency is allowed to pass through, hence, low-pass. Frequencies higher than the cutoff frequency are filtered out.

At a frequency just below the cutoff frequency, the virtual maximum frequency allowed to pass through steadily, there is a peak in the frequency amplitude, meaning signals at this frequency pass through the low-pass filter at maximum strength. This ideal frequency is referred to as the resonant frequency of the pickup and is a defining parameter in pickup choice. The resonant frequency of most pickups is in the range of 2,000 - 5,000 Hz. A resonant frequency between 2,000 - 3,000 Hz will produce the most generally appealing sound.

The resonant frequency output of a pickup is primarily a function of three variables:

1. The pickup's inductance and capacitance
2. The capacitance of the guitar cable being used
3. The input impedance of the amp being used

These variables in the resonant frequency must be deliberately chosen in order to get the desired resonant frequency in the range of 2,000 - 3,000 Hz. Only certain combinations of these three variables will yield the optimal resonant frequency. Deviation outside of the optimal value in each of the three variables will result in undesired resonant frequency and thus a less than ideal output sound.

While optimization techniques that involve the the 2nd and 3rd variables are outside the scope of this blog, illustrating that pickups are a fundamental part of the resonant frequency equation serves to explain why choosing the right pick up is important. Once the ideal frequency range is achieved, the pickup's inductance has further implications on sound quality and tone, which make it the driving parameter in choosing a pickup.


3. Leverage Your Understanding to Make an Informed Purchasing Decision

Once you are familiar with the desired parameters in a guitar pickup, you are equipped to make an informed purchasing decision. To reiterate, the goal is to find a pickup that, in conjunction with your guitar cable and amp, will produce a resonant frequency in the 2,000 - 3,000 Hz frequency and that is most suited to your tastes. For the purpose of the technical scope of this blog, it will be assumed that the cable and amp combination are already intelligently chosen. The objective of the consumer is to now purchase a pickup based on the inductance value that fits the desired sound. The consumer should then familiarize themselves with the sounds produced by pickups of different inductance values in order to develop an understanding of the affect of inductance value on sound output. Pickup manufacturers typically publish audio samples of their products, these samples are a great resource for familiarizing oneself with different pickup sounds.

The primary goal of the informed consumer is to examine how choosing a pickup, based on a measurable and quantifiable parameter, can positively benefit the output sound of the guitar. The spec of interest, when it comes to purchasing a pickup, is primarily the pickup's inductance. In the abstracted sense, the inductance is a measure of the electrical "size" of the coil. In reality, different inductance values generate different resonant frequencies and thus the inductance values provide an easily measurable characteristic of the pickup that can be used to drive purchasing decisions.

The smaller the inductance value of the pickup, the more treble will be produced in the sound output. Whereas, higher inductance values correlate to more midrange and bass. These two boundary conditions, high and low inductance, allow for a spectrum of sound quality to be developed on a scale of inductance values. To assign some numbers and familiar guitars to these inductance values, a Fender Stratocaster comes stock with pickups with 2.2 H of inductance, whereas a Fender Precision Bass ("P-Bass") has pickups with 6.0 H of inductance.


The inductance values for pickups can be found in their spec sheet. A parametric approach to choosing a pickup will free you from pick up manufacturer's marketing tactics of subjectively describing the sound output and quality of their product, allowing you to base your purchasing decision on a measurable parameter of sound output and quality, the inductance.


Images Credits :

https://smhttp-ssl-30815.nexcesscdn.net/media/catalog/product/cache/1/image/9df78eab33525d08d6e5fb8d27136e95/t/o/tomhf1-.jpg

https://dt7v1i9vyp3mf.cloudfront.net/styles/news_large/s3/imagelibrary/g/guitartech03stratpickup-Gh18ZIOgf0tSXWIVJa8FshIeZivokzan.jpg

https://blogger.googleusercontent.com/img/b/R29vZ2xl/AVvXsEiS9LGVJIQdHXY8D_C-N5H0LzM9GEFPk_MHlSPma7gVHHZx739gEGqTwARzXjHrP3A6vwCpz0pSCVFHEjzwUThRFtcwJYZbjL2gbhi75c6DWtWa7yAa78xHE3mTdc25ZBH_dJ5I8fqxpVyf/s640/Jimi_Hendrix_Baron_Wolman_01.jpg

https://upload.wikimedia.org/wikipedia/en/thumb/7/7d/RLC_low-pass.svg/570px-RLC_low-pass.svg.png


http://www.checkthespec.co.uk/img/cts_logo-400x271.png